The easiest way to replace a contactor for a do it yourself repair is to first make absolutely certain the power is turned off. Also make sure the air handler is shut off as the 24 volts to the contactor is powered from there. If the 24 volt circuit is left powered on you stand the chance of shorting out a control wire and burning out the 24 volt transformer. After you have verified all power is off remove the mounting screws and pull the old contactor out of the way without removing any wires if possible. If you must remove wiring make sure and mark the location the wire was connected to. Install the new contactor. Disconnect each wire and reconnect to the new contactor before removing the next wire. If you change one wire at a time you should not have any problems.
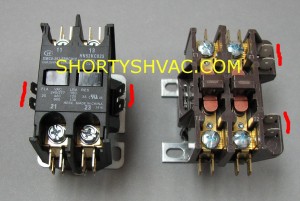
I have included a picture showing an old style contactor and a new style contactor. The new style has a dust cover over the contacts that is removable to inspect the contacts. The new style also has the 24 volt connections located on each side. The old style contactor does not have a dust cover over the contacts and the 24 volt connections are on the same side. I have drawn a red line beside the 24 volt connects for reference. The 24 volt connections are not polarity sensitive as the voltage is AC. It does not matter which connection the wires are placed on as long as both wires are not on the same connection.
Contactors can be purchased for do it yourself repairs from Shortys HVAC Supplies. If you are not sure of the correct part number please call or email us at parts@shortyshvac.com and we will be happy to identify the correct part for you.

